Hello my lovelies. I hope you all are doing well.
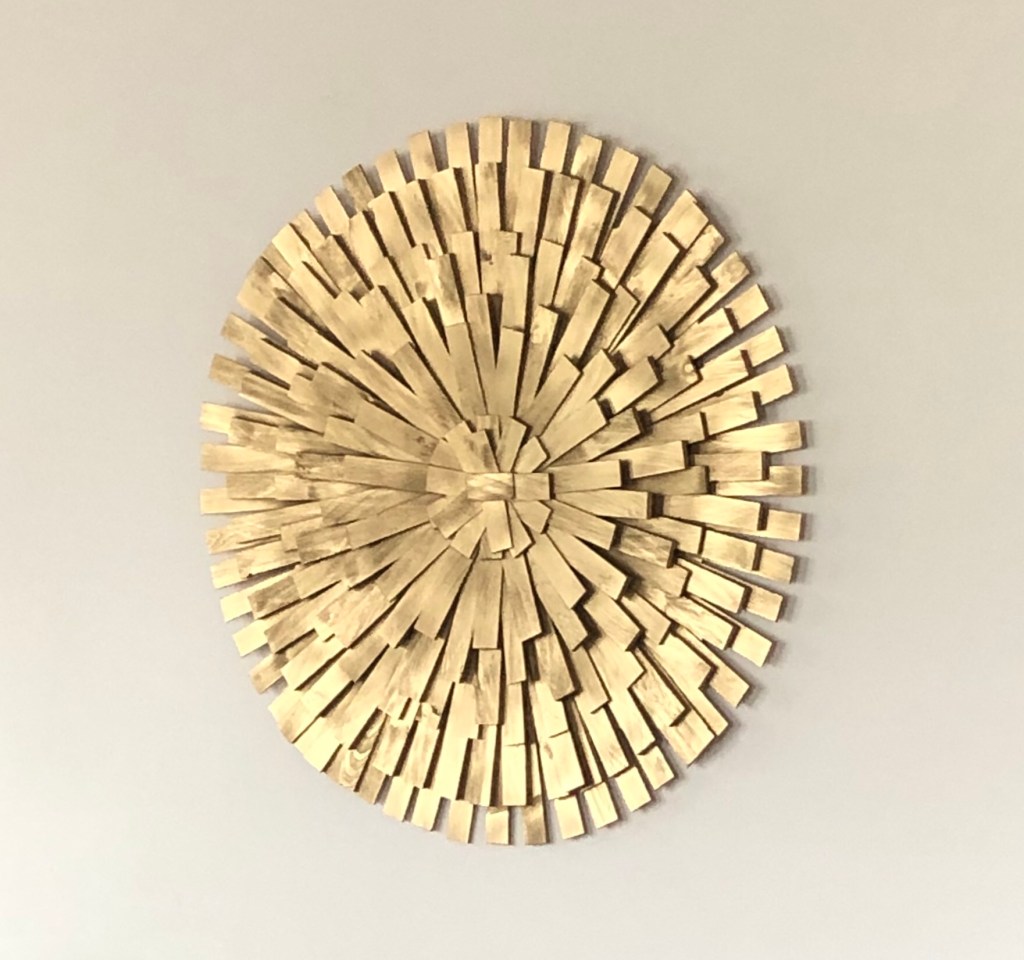
Have you ever seen a piece of wall decor or art and thought, I can totally DIY that! Well the piece I’m sharing with you today sort of, kind of started that way.

I found it on Havertys.com and thought to post it as inspiration to my followers on Instagram as a weekend DIY project. I had another DIY project in mind for the weekend, but a follower was very excited about my post and commented “That would look great in my guest room. Please show me how to make it.” And just like that, I had a new DIY project on my hands. I decided to postpone my original DIY project to the upcoming weekend and give this Juju Wall Decor a try.
I could not exactly finish this project over the last weekend because I started it on Sunday. I hung out with my boys on Saturday being that I had passed up a “hang out” opportunity the weekend before that. I finished the piece in a little over an hour, minus a quick run to The Home Depot in between to get more wood shims and the time it took to spray paint it.
It was a fun project! I’m always amazed at the DIY process from start to finish and my reaction is always “wow” at the end.
To create this DIY Juju Wall Decor piece, I used:
- 22 packs of Mini Cedar Wood Shims
- Sanded Plywood (1/4in. x 2ft. x 2ft.)
- Glue gun
- Hot glue sticks
- Rustoleum Metallic gold Spray Paint (2 cans)
Follow the instructions below to create this DIY Juju Glam Gold Wall Decor:
- Prep the wood shims by cutting off the rough end of each stack. I used a miter saw for this process. You can sand the ends roughly if you cannot trim the ends like I did. Note: cutting off the rough ends took off about an inch off the wood shims. Your wall decor piece will end up bigger than 36″ without the one inch end removed.
- Clean the surface of the plywood. Wipe both surfaces with a dry rag to remove any dust.
- Now will be a good time to think about how you want to hang your finished piece. If you plan to use hanging hooks, attach them now. It may be difficult to do this later when the piece is finished. I used one saw tooth hanger and it has worked well so far.
- Draw 6 circles with the following diameter measurements – 22″, 18″, 13″ 10″, 6″ and 4″ (see how to draw large freehand circles here). Label the circles as #1 through #6. #1 being the largest and #6 being the smallest.
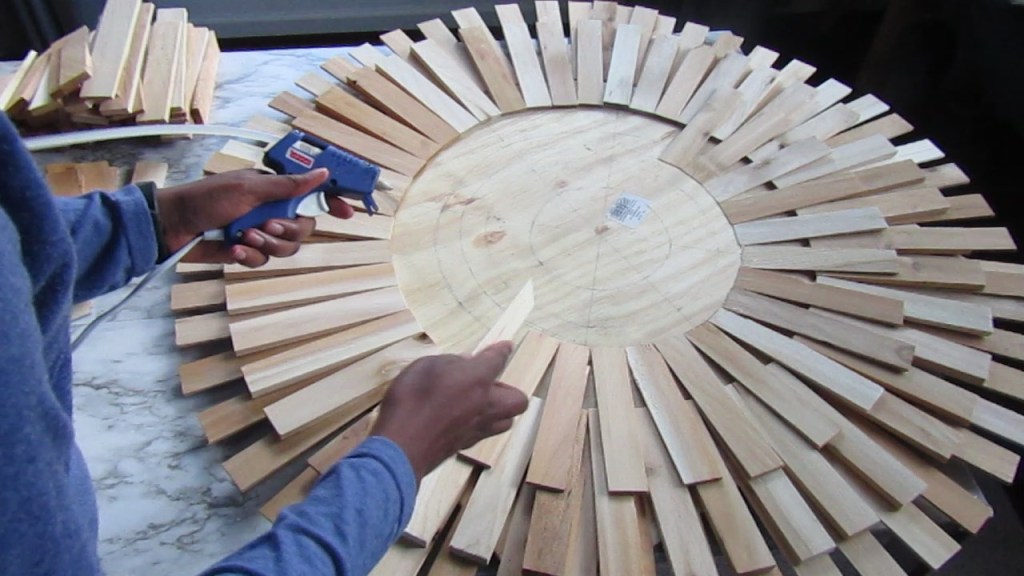
- Start by gluing thin wood shims around the biggest (22″ diameter) circle. Use the circle as a guide to position each wood shim as you start gluing them to the plywood.
- After the first circle is complete, proceed to circle #2 (18″ diameter). Use the thicker wood shims for this circle. Be sure to apply the hot glue only to the area that will make contact the plywood.
- Repeat step 5 and use the thin wood shims for the next circle (#3, 13″ diameter)
- For circle #4, use thick wood shims. Do not place the shim next to each other. Alternate the position of each wood shim by covering every other v-shaped crevice from the previous circle/layer.
- For circle #5, use the thicker wood shims as well and alternate the position of the wood shims like you did for circle #4.
- Use the thin shims for circle #6 and alternate the position as well.
- Repeat the same alternating pattern again for circle #6 until all the v-shaped crevices are covered.
- To close the center of the plywood, cut a few thin shims in half and use the alternating pattern used in the previous steps until you’re left with a small hole in the middle. Cover the hole with another 1/2 piece of thin wood shim. I used 16 pieces in all for this step.
- Take the project piece to a well ventilated area to spray paint it.
- Spray paint it according to preference and let it dry completely.
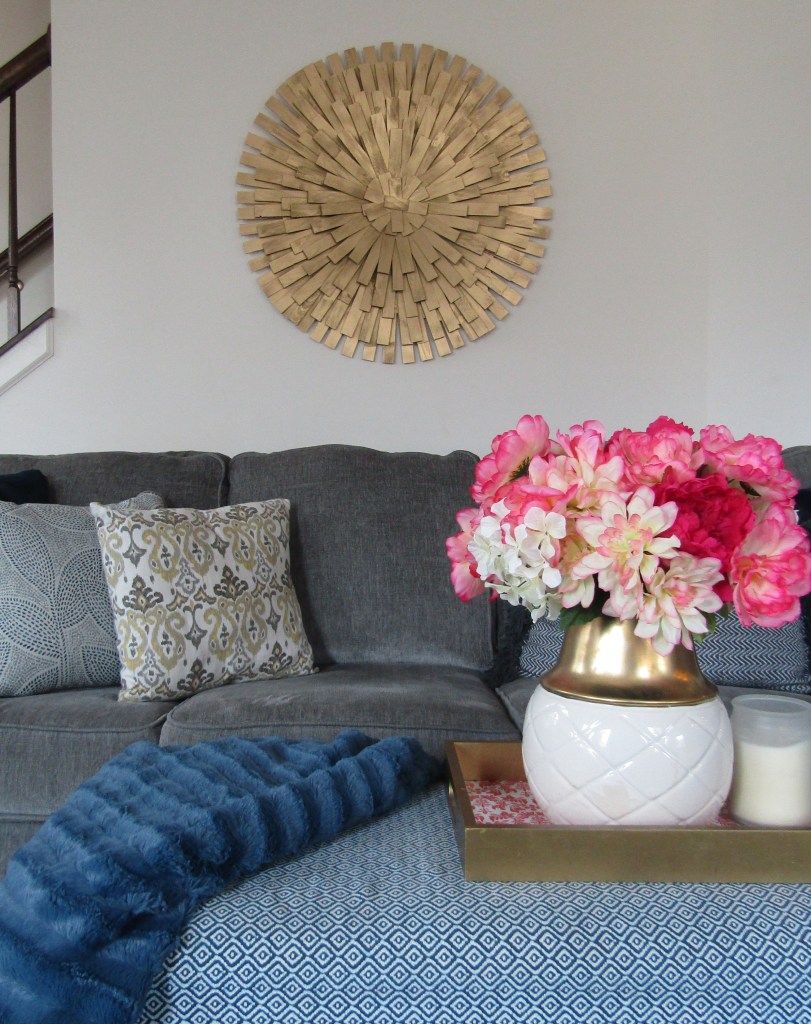
- Hang it!
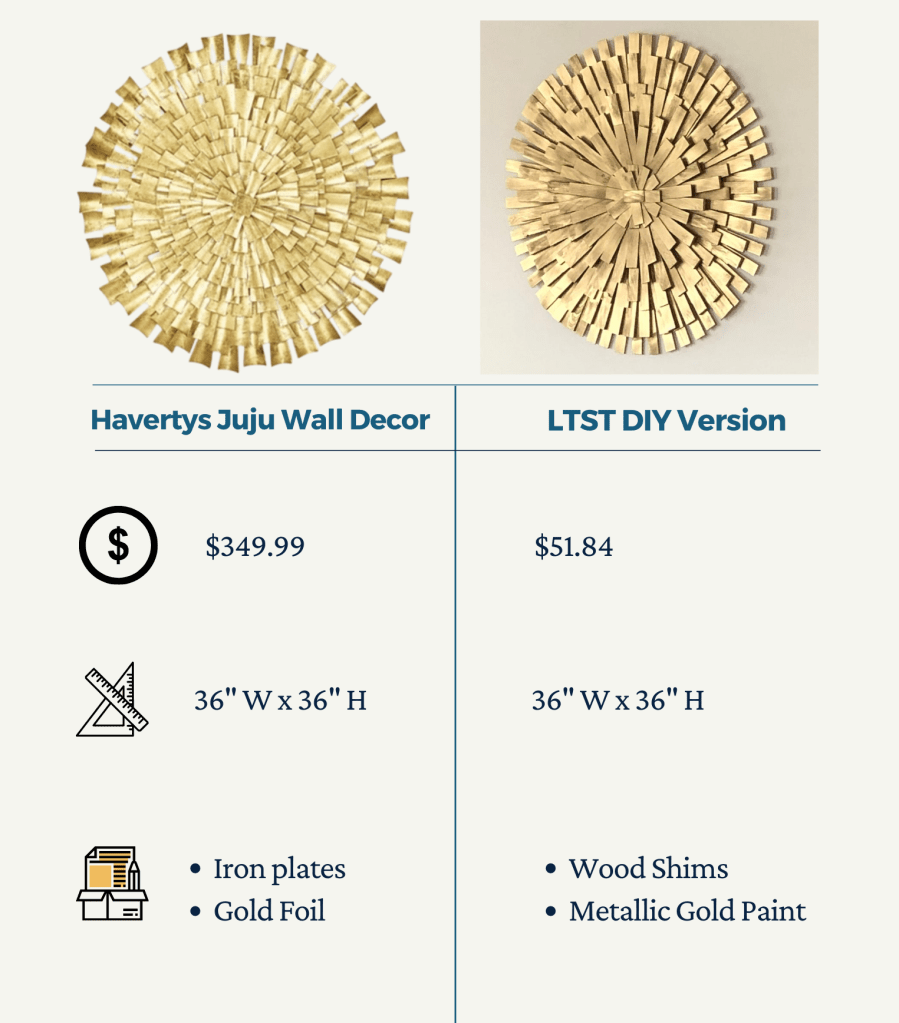
How is my DIY version different from the Havertys’ Juju piece?
Would you rather watch how to make it? Click here.
Want More Ideas!
Don’t want to use plywood, or looking for a even more budget-friendly option?
Try using paint chips/cards. These are practically free and all you will have to do is cut them to shape.
You can also use a foam board in place of plywood for the back of your piece.
Want to get more into woodworking? Take a look here.
Subscribe to get blog updates!
Recent Blog Posts

7 Tips and Tricks Beginner Woodworkers Should Know
Get to know the 7 important tips and tools that all beginner woodworkers need to know to start building your own furniture!

DIY Accent Wall – Master Bedroom Update
Update your boring master bedroom today by creating an accent wall. See how I created this simple, blue accent wall in my bedroom.

How to build a Workbench in 6 easy steps!
How to build a workbench: build a simple workbench in 6 easy steps. How to build a large workbench for home shop or garage.


Leave a Reply