
Do you know what I’ve been wanting to do for a while?
Go to public places without a mask on! Haha
But that’s not possible yet, so I had to go with what’s possible right now.
What is that, you ask?
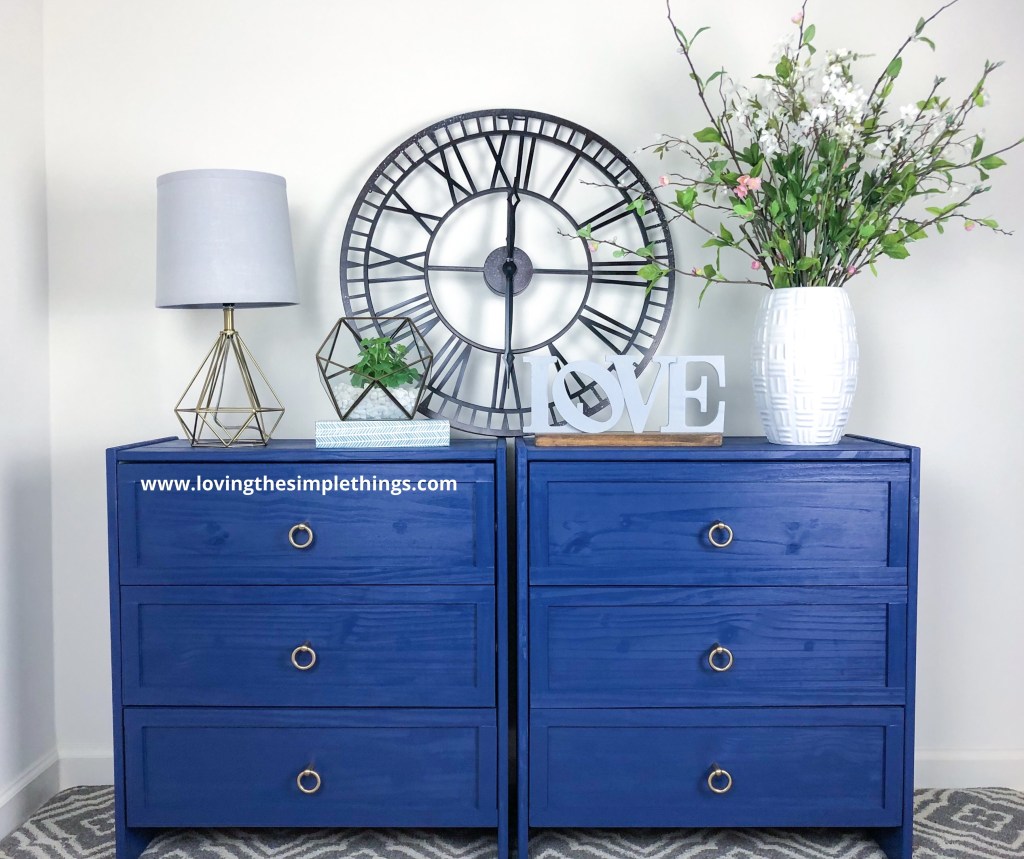
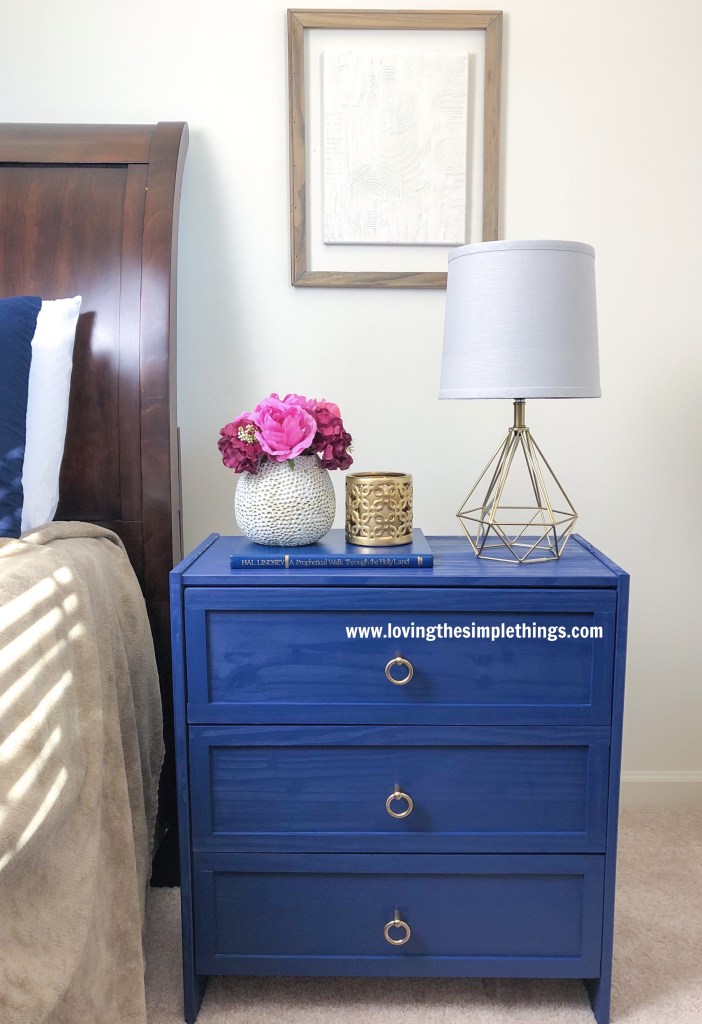
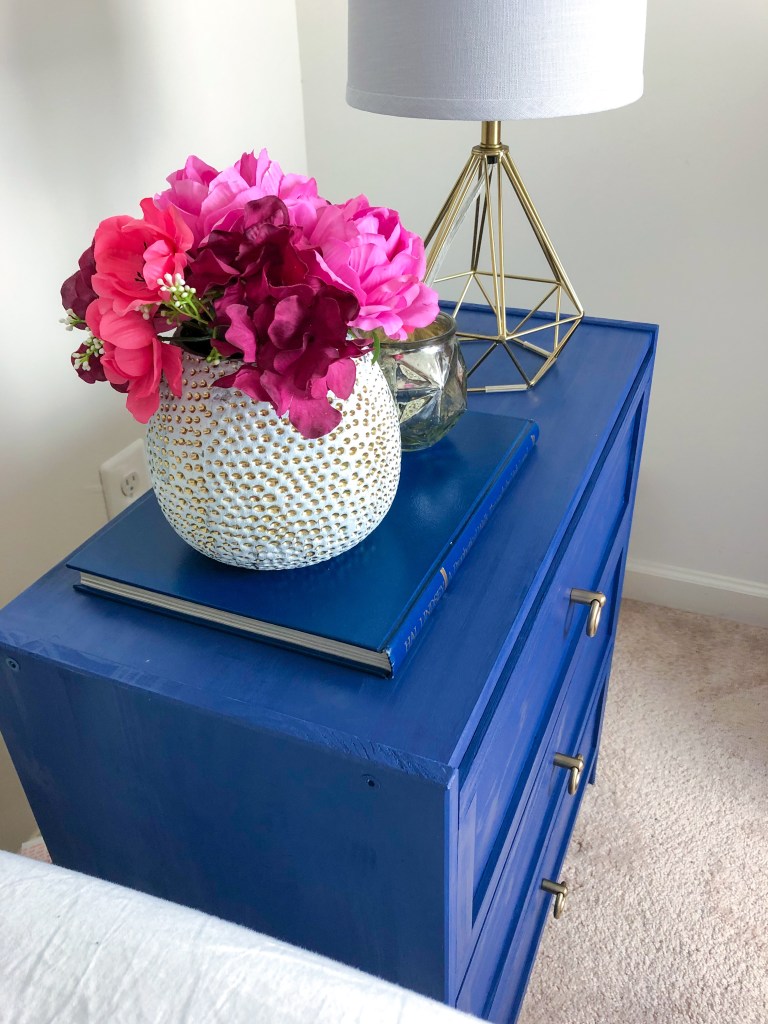
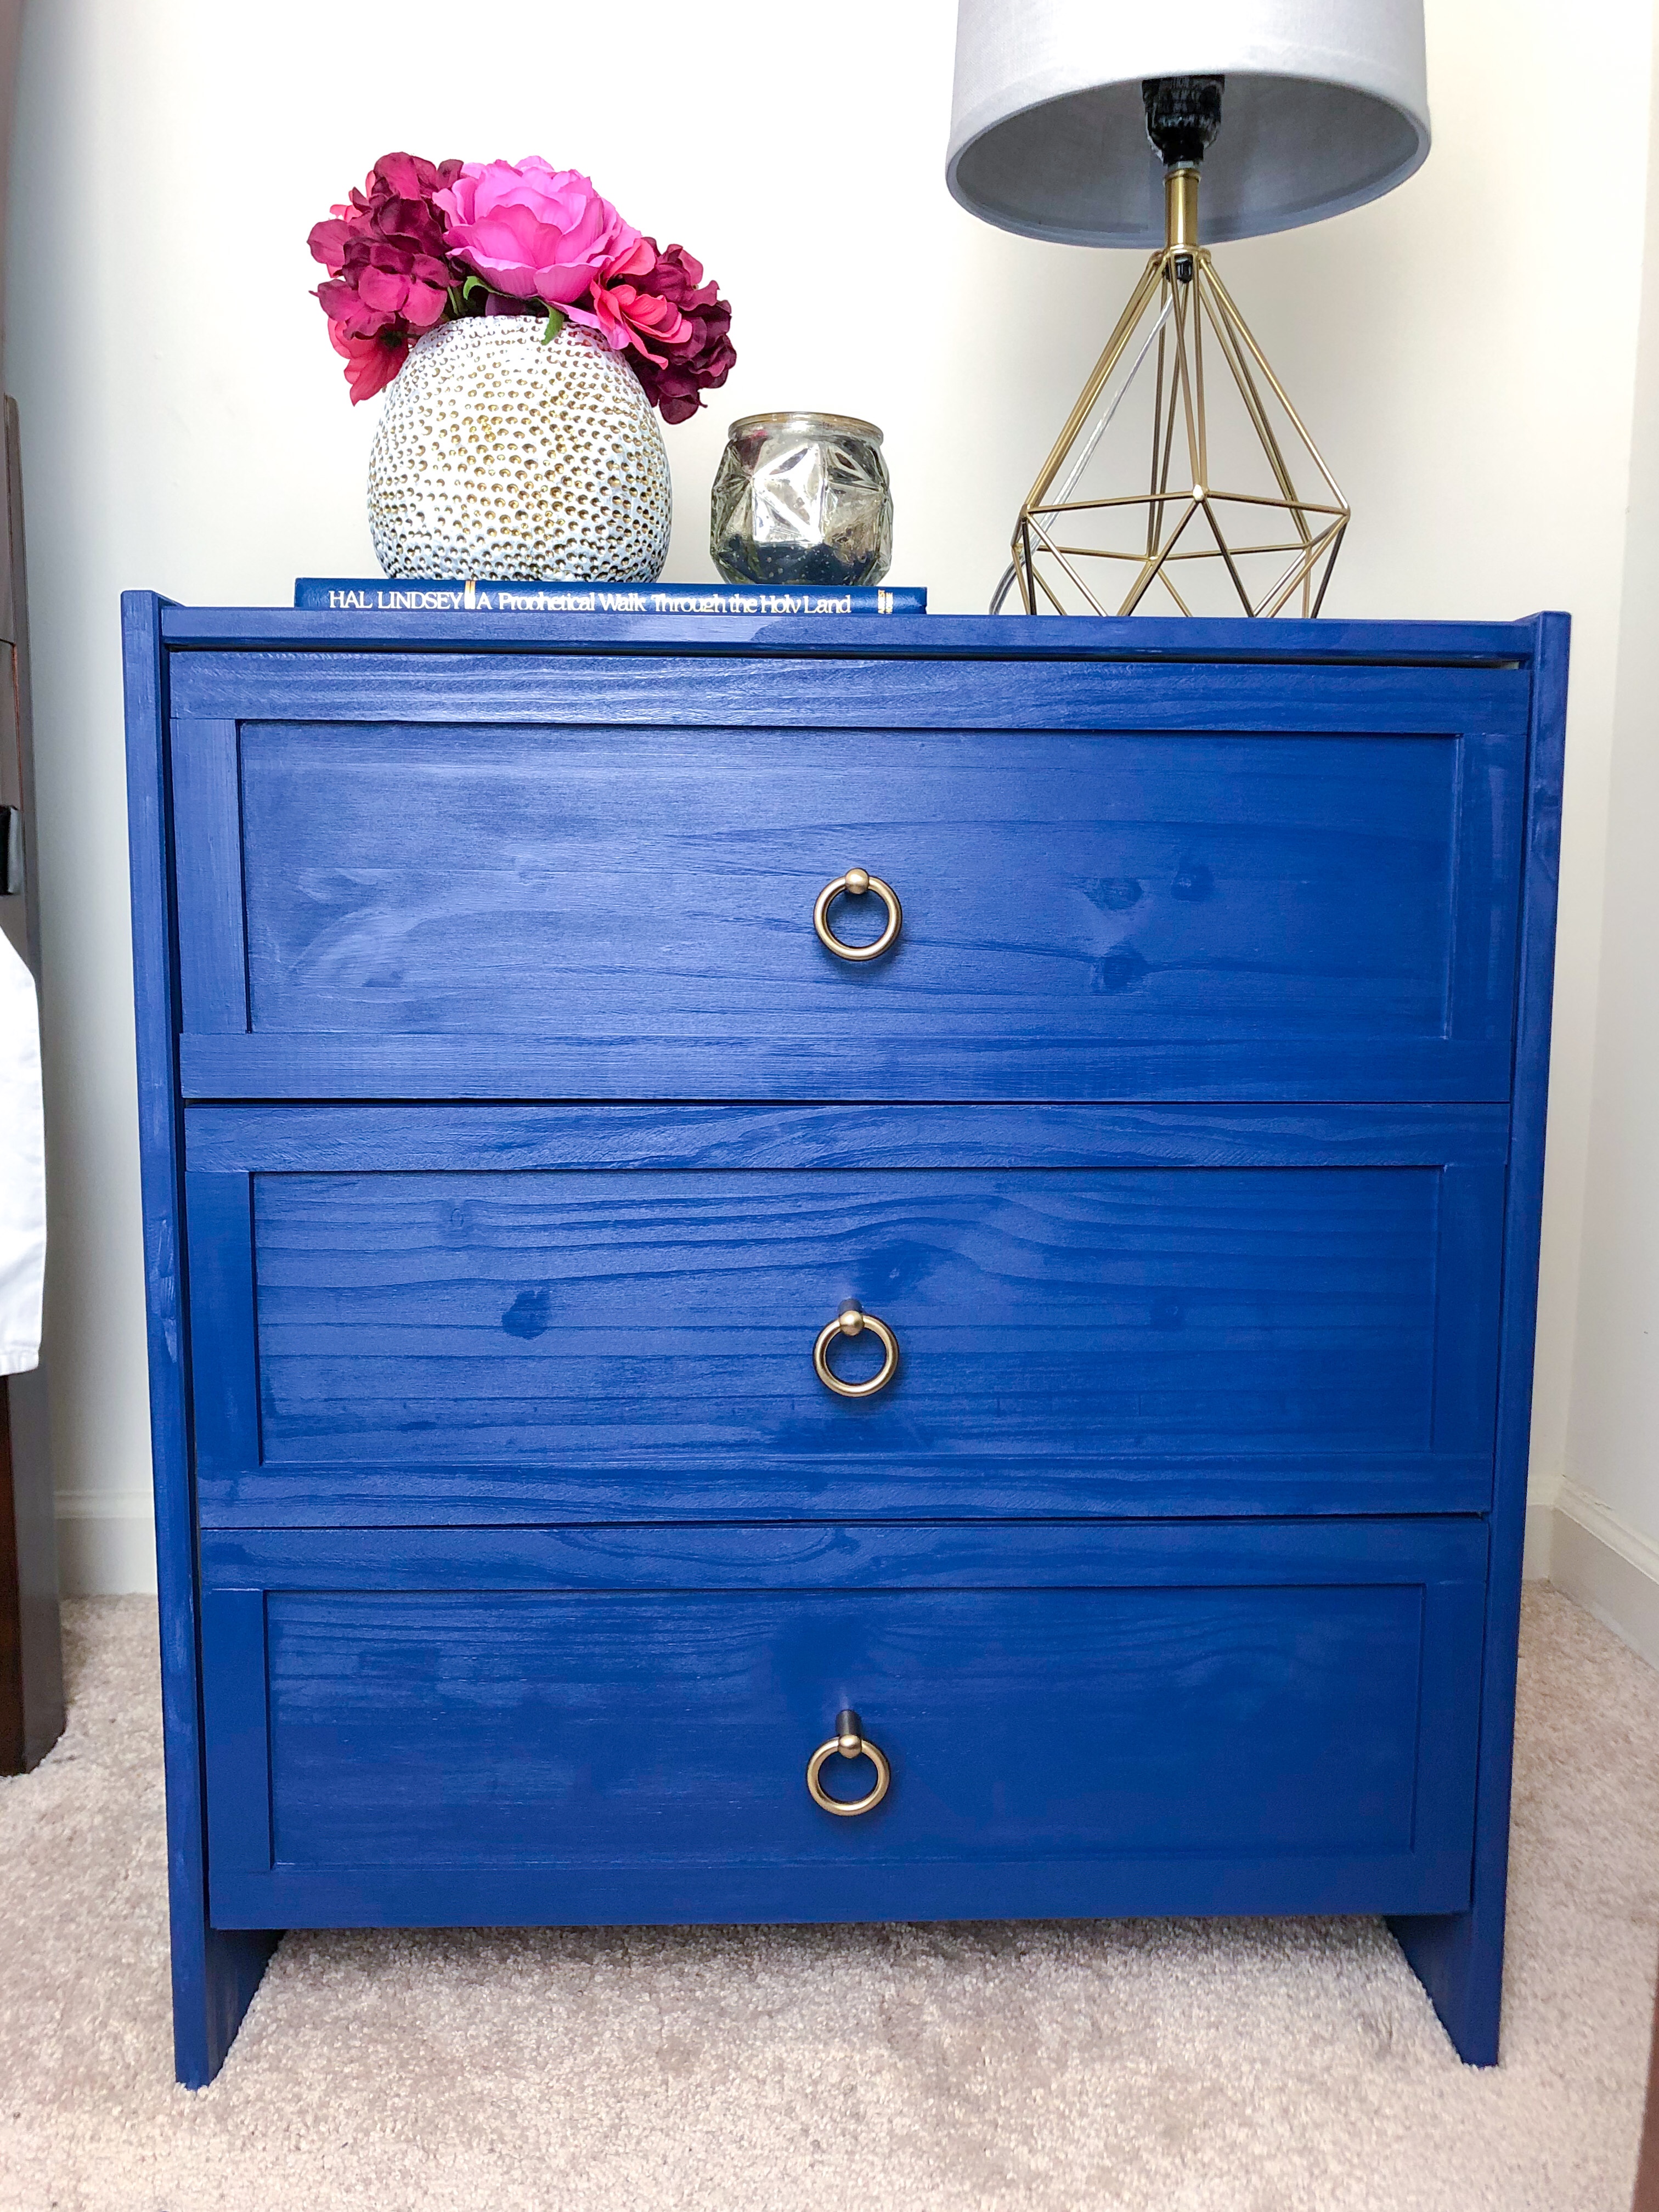
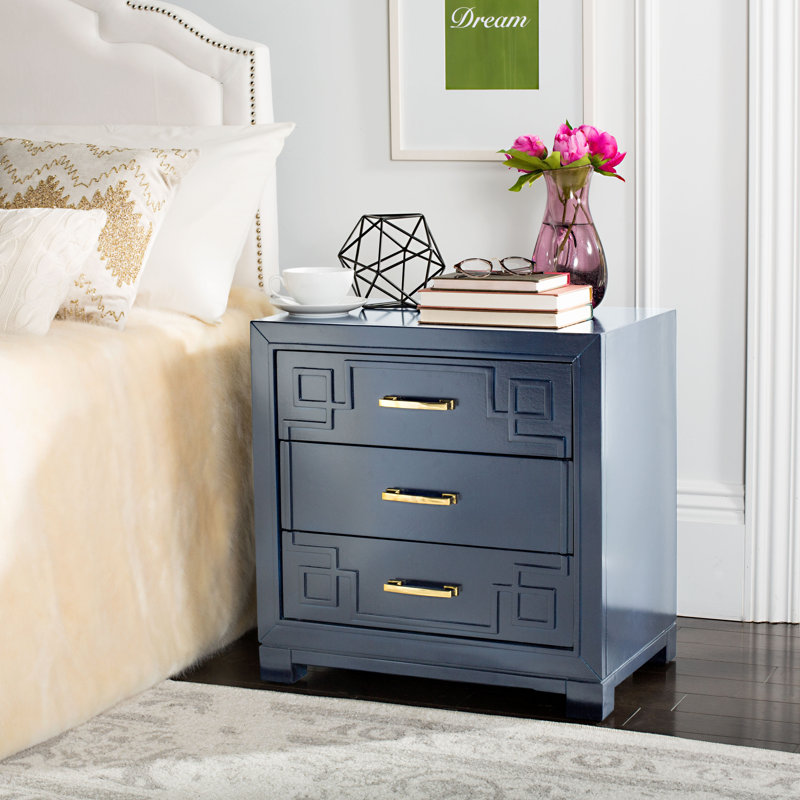
Transforming a set of IKEA RAST chests into chic nightstands!
I’ve been wanting to do this DIY transformation for a while, and I’m happy to have been able to finally get it done! Plus, it’s too cold to build anything in my cold, uninsulated garage. Hooray for indoor projects!
Before I get into the transformation process, lets talk about the cost of these chest of drawers. They cost $40 each and are made with pine wood. They are sold in an unfinished state, so you can customize them to your preference or use them as is.
I initially thought about going the wood stain route, but I was not in the mood for the several steps required to stain furniture properly; 1- wood conditioner, 2- coats of stain, and then polyurethane. And don’t get me started on the strong fumes of oil-based wood stain. I knew going the paint route would be safest for indoors, and there would be no need to prime the furniture first since the pieces are unfinished. Can I get a amen? 😉

The first thing I did was to assemble both pieces of furniture, then decided on the changes I wanted to make. My main goal was to transform the chests with the least amount of money as possible.
Materials:
- Pine Lattice Moulding
- Wood Glue
- 6 Drawer Pulls
- Wood filler/putty
- 1- Quart Cabinet & Furniture Paint from Lowes (or try this)
- 1″ Brad nails (for nail gun)
- Angled paint brush
- Sanding Block or sand paper
Tools:
- Screw driver/ or Power drill
- Nail gun or Hammer
- Tape measure or yard stick
Below are the steps I followed:
- Remove all the drawers and the bottom piece that covers the bottom front of the chest of drawers. Remove the wooden drawer pulls as well.
- Measure the dimensions of the front of the drawer.
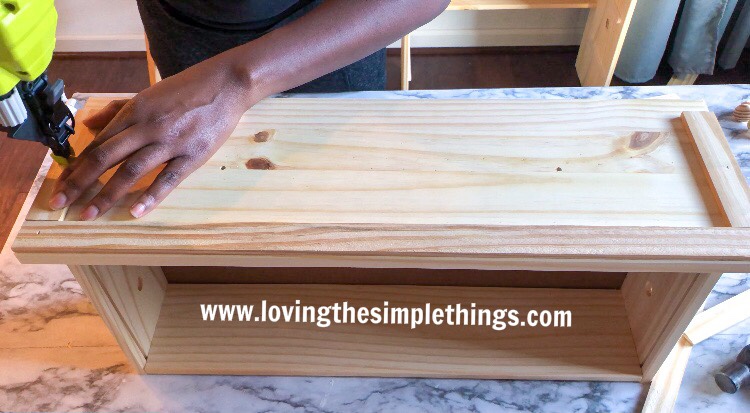
- Cut the pine lattice trim according to the measurements from step 2 with a miter saw (or a miter box & saw combo). I used 12 (5 3/16) and 12 (22 7/8) trim strips.
- Apply wood glue to one side of each pine strip and attach the then to the front on each drawer with a nail gun (as shown in the image above).
- Fill nail holes and the original drawer pull holes with wood putty, then sand the filled areas after adequate drying time.
- It’s time for paint! I used Valspar Cabinet and Furniture Paint from Lowes. I really like this brand because it was tintable. I was initially going for chalk-like paint, but the brand I found was only tintable in light colors. This dark blue is called Mystified.
- Apply two coats of paint to the exterior of each drawer and the exterior of the body of the chest.
- Install new drawer pulls. Measure and mark the center of the drawer and drill a new hole for the new drawer pulls.
Notes and Tips:
- If you don’t have a nail gun, feel free to use a hammer and 1″ finishing nails.
- Consider making a template to mark the center of the drawer before you install the new drawer pulls. I like to use templates as a short cut when possible. To do this, I cut out a piece of cardboard that fit the exact space in the front of the drawer, and then poked a hole in the center of it. I placed this cardboard template on each drawer and marked through the hole a pencil. This way, I avoided measuring the center repeatedly and ensured identical placement of the pulls.
Subscribe for Blog Updates
Latest Instagram Posts
See What I’m Pinning
Recent Blog Posts


Leave a Reply